

Recipes

Lemon Spaghetti Recipe with Salmon Fillet – easy and quick pasta with salmon
Lemon Spaghetti with Grilled Salmon Fillet Fresh lemon notes meet creamy pasta and tender grilled salmon fillet – a light, aromatic dish, perfect as a pasta with salmon recipe for camping or at home. The linguine (or spaghetti) are tossed in a delicate lemon-butter sauce, refined with Parmesan and optional cream for extra creaminess. Accompanied by a perfectly grilled salmon fillet – quick to prepare, Mediterranean-inspired, and full of flavor! Ingredients for 2 servings For the Lemon Pasta with Salmon:• 250 g linguine or spaghetti• 1 organic lemon (juice & zest, rich in vitamin C)• 2 tbsp olive oil• 2 tbsp butter• 50 ml cream or cooking cream (optional, for more creaminess)• 50 g Parmesan (grated)• Salt & pepper For the grilled salmon:• 2 salmon fillets (fresh, about 150–180 g each)• 1 tbsp olive oil• Salt & pepper Preparation1. Cook pasta– Cook linguine or spaghetti in plenty of salted water until al dente (approx. 8–10 minutes).– Reserve some of the cooking water.2. Grill salmon– Rub salmon fillets with olive oil, salt, and pepper.– Grill on the grill (or in a grill pan) for 3–5 minutes per side, depending on thickness. Keep warm.3. Prepare lemon sauce– Heat olive oil and butter in a pan.– Add lemon zest and lemon juice (source of vitamin C).– Stir in cream (if desired) and bring briefly to a boil.– Stir in Parmesan and season with salt & pepper.4. Mix in pasta– Add linguine or spaghetti directly to the lemon sauce and toss well.– If necessary, add a little cooking water until a creamy emulsion forms. TipFor even more aroma, briefly marinate the salmon fillet in lemon juice, olive oil, and garlic before grilling. This creates a delicious pasta with salmon dish in under 10 minutes, which is also rich in fiber and calorie-conscious.
Learn more
Orzo with Leeks and Lemon: Fresh Recipe for Delicious Salads
Lemon Leek Orzo: Fresh, creamy, and full of flavor: This Lemon Leek Orzo combines tender rice-shaped pasta (also known as kritharaki) with aromatic leeks, fresh lemon juice, and creamy cream cheese. Parmesan perfectly rounds off the dish. Quick to prepare, light yet satisfying – ideal for camping kitchens, but also as a summery salad or an uncomplicated lunch at home. A true comfort food with a Mediterranean touch! Ingredients for the Orzo with Leek and Lemon Ingredients• 1 leek• 250 g orzo (rice-shaped pasta / kritharaki)• 500 ml vegetable broth• 100 g cream cheese• Juice of 1 lemon• 50 g Parmesan• Salt & pepper• Optional: a little extra broth or water for a creamier consistency• A little olive oil for sautéing• Optional: finely chopped garlic for more aroma Preparation of the creamy Orzo dish Preparation1. Clean the leek, wash thoroughly, and cut into fine rings.2. Heat a little olive oil or butter in a pot and briefly sauté the leek and optional garlic.3. Add the orzo, toast briefly, and deglaze with the vegetable broth.4. Simmer over medium heat for approx. 10–12 minutes until the pasta is cooked and the liquid is almost absorbed.5. Stir in the cream cheese until a creamy sauce forms.6. Add lemon juice and freshly grated Parmesan and mix well.7. If the pasta seems too dry, add a little more broth or water until a nice "gooey" consistency is achieved.8. Season with salt and pepper and serve immediately – also goes excellently with fresh salads or with spinach as an extra vegetable side dish. TipStir frequently, as the small pasta can quickly stick to the bottom. This dish is also excellent for on-the-go, for example when camping on a gas grill, thanks to its simple preparation and flexible ingredients.
Learn more
Savory Stuffed Sweet Potatoes: Recipe with Tuna and Corn Filling
Hearty stuffed sweet potatoes, creamy tuna-corn filling, and fresh herbs – a simple, satisfying main course for camping, baking at home, or on the go. The sweet potatoes are cooked until soft in a camping oven or regular oven and then filled with a savory mixture of tuna, corn, and cream cheese. Quick to prepare, nutritious, and full of flavor – perfect for anyone who loves uncomplicated comfort food. Ingredients for 2 servings of stuffed sweet potatoes • 2 large sweet potatoes• 1 can tuna (drained)• 1 small onion (finely diced)• 3 tbsp corn• 2–3 tbsp cream cheese or cottage cheese• 1 tbsp chives (chopped)• Salt & pepper• A little oil• Optional: fresh herbs or spring onions for garnish Preparation of stuffed sweet potatoes 1. Wash sweet potatoes thoroughly, prick several times all around, and wrap in aluminum foil.2. Bake in a preheated camping oven (e.g., Omnia) or a regular oven at medium heat for about 40–50 minutes until soft.3. Mix tuna, corn, cream cheese, and onions in a bowl, season with salt & pepper.4. Cut the cooked sweet potatoes lengthwise and lightly loosen the inside.5. Fill with the prepared tuna-corn filling.6. Serve with fresh chives or other fresh herbs. Tip for leftovers and variations Leftovers of the filling are excellent as a spread or dip – also ideal for your next outdoor excursion or camping trip, especially if you have a gas stove or gas grill on hand. For extra flavor and a bit more vegetables, you can add bell peppers or zucchini to the filling.
Learn more
Mushroom Gnocchi with Spinach and Thyme – Creamy Gnocchi Mushroom Pan
Mushroom Gnocchi with Spinach and Thyme – a creamy, comforting dish that you can easily prepare on your camping stove. Cooked with just a few ingredients and in a short amount of time, this creamy gnocchi and mushroom pan tastes like true comfort food. Ingredients for the Gnocchi and Mushroom Pan with Baby Spinach Ingredients:• 500 g gnocchi (from the refrigerated section or vacuum-packed)• 200 g brown mushrooms or mixed mushrooms• 100 g fresh baby spinach• 1 small onion• 1 clove garlic• 200 ml cream or cooking cream• 50 g Parmesan cheese• 1 tsp thyme (fresh or dried)• Salt & pepper• A little oil for frying• Optional: toasted pine nuts for garnish Preparation of the Creamy Gnocchi and Mushroom Pan Preparation:1. Finely chop the onion and garlic. Clean the mushrooms and slice them.2. In a large pan with a high-performance burner, heat a little oil and fry the gnocchi for 4–5 minutes until lightly golden brown. Remove and set aside.3. In the same pan, sauté the onion and garlic.4. Add the brown mushrooms and fry vigorously until lightly browned.5. Deglaze with cream, add thyme, and let it reduce briefly.6. Add gnocchi and baby spinach to the sauce, mix well, and let it simmer over low heat for 2–3 minutes until the spinach wilts.7. Season with salt, pepper, and freshly grated Parmesan.8. Serve hot directly from the pan and sprinkle with toasted pine nuts, if desired. Tips for the Mushroom Pan Tip:• Instead of Parmesan, Pecorino or a strong mountain cheese also tastes excellent.• You can combine different types of mushrooms to add more depth of flavor to the mushroom pan.• Using fresh baby spinach provides a particularly tender texture and a mild taste that harmonizes perfectly with the creamy sauce.
Learn more
Quick Pan Pizza Recipe: How to make pan pizza easily
Pan pizza? Pizza without an oven? No problem! With this pan pizza, you can create crispy delight right on your camping stove or hob. The dough is mixed in a flash, and the toppings are freely selectable – from classic tomato sauce and cheese to your favorite ingredients. Simply roll it out, bake it in the pan, and enjoy with melted cheese. Perfect for camping, quick meals, or cozy evenings at home! Ingredients for the dough For 2 people• 200 g flour (e.g., wheat flour type 405)• 1 tsp baking powder• ½ tsp salt• 120 ml water• 2 tbsp olive oil Ingredients for the topping Optional:• 3–4 tbsp tomato sauce (or strained tomatoes with oregano & salt)• 100 g grated cheese (e.g., mozzarella)• Desired topping: e.g., salami, ham, bell peppers, mushrooms, onions… Preparation of the pan pizza 1. Mix flour, baking powder, and salt in a bowl.2. Add water and olive oil and knead to a smooth dough. Let rest briefly.3. Heat a non-stick pan on the hob over medium heat, roll out the dough thinly, and place it in the hot pan.4. Bake over medium heat for approx. 3–4 minutes until the bottom is browned, then flip.5. Spread with tomato sauce, distribute cheese and toppings on top.6. Put the lid on and bake for another 5–8 minutes over low heat until the cheese is melted.7. Remove the pizza from the pan, let cool briefly, and enjoy. Tips for the perfect pan pizza • The thinner the dough, the crispier the pizza.• For extra flavor, you can add a little olive oil to the pan or brush the edge with olive oil before baking.• Season the topping with fresh pepper and salt.• Pan pizza can also be prepared in the oven if no hob or camping stove is available.
Learn more
Bell Pepper Burger
Paprika Burger: a creative alternative to the classic patty! Juicy ground beef is stuffed into an aromatic bell pepper half and cooked to perfection on the grill. Add fresh ingredients like lettuce, tomato, and your favorite sauce – for a burger that's not only juicy but also incredibly flavorful. Ideal for camping or at home, quick to make, and guaranteed to be a hit! Ingredients for 2 burgers For the stuffed peppers: • 1 large bell pepper – halved, yields 2 halves • 200 g minced meat • small onion (finely diced) • 1 clove of garlic (chopped, optional) • 1 egg • 2-3 tbsp breadcrumbs or paneer • 1/2 tsp paprika powder or BBQ seasoning • Salt & pepper • Optional: Cheese for topping For the burger: • 2 burger buns • 2–4 lettuce leaves • 2 tomato slices • Sauce of your choice • Cucumber slices Preparation: 1. Wash the bell peppers, halve them, remove the seeds and set aside. 2. Mix the minced meat well with the onion, garlic, egg, breadcrumbs, paprika powder, salt & pepper. 3. Fill the two bell peppers evenly with the minced meat mixture, press down lightly and halve. 4. Grill the stuffed peppers indirectly over medium heat for 15–20 minutes, until the mince is cooked through. 5. If desired, add cheese to the mince during the last few minutes and let it melt. 6. Briefly toast the burger buns, spread with sauce and top with lettuce and tomato slices. 7. Place one filled pepper half as a "patty" on the bun, top with cucumber/jalapeños as desired and put the lid on. Tip: • You can vary the minced meat as you like, e.g. with herbs, feta or bacon cubes.
Learn more
Stuffed Chicken Breast Recipe with Tomato & Mozzarella – Step-by-Step Preparation
Stuffed Chicken Breast with Tomato & Mozzarella on Rice with Creamy Herb Sauce Tender chicken breast, filled with aromatic tomato and creamy mozzarella – served with fluffy rice and a delicate herb sauce. This dish combines Mediterranean freshness with creamy seasoning and is perfect for camping or at home. Quickly prepared in a pan, satisfying and full of flavor – a real treat for anyone who loves uncomplicated yet refined dishes. Ingredients for 2 servings For the chicken:• 2 chicken breast fillets• 1 ball mozzarella• 2 tomatoes (or a few cherry tomatoes)• Salt & pepper (season with salt and pepper)• a little olive oil For the rice:• 150 g basmati rice or long-grain rice• 1 tsp salt For the herb sauce:• 200 ml cream or cooking cream• 100 ml vegetable broth• 1 tsp mustard• 1 tsp lemon juice• fresh herbs (e.g., parsley, chives, basil) or frozen herb mixture• Salt & pepper Preparation:1. Cook rice according to package instructions in lightly salted water and keep warm.2. Slice the chicken breast lengthwise to create a pocket. Season with salt and pepper.3. Slice the tomatoes and mozzarella. Fill the chicken breasts and secure with toothpicks.4. Heat a little olive oil in a pan. Brown the stuffed chicken breast on both sides until golden. Reduce heat, cover, and let simmer for approx. 10–12 minutes until the meat is cooked through.5. For the sauce, bring cream and broth to a boil in a small pot. Stir in mustard and lemon juice. Finely chop the herbs and stir them in. Season with salt and pepper and let simmer briefly.6. Distribute the rice on plates, place the chicken breast on top, and pour the creamy herb sauce over it. Tip:• For extra flavor, spread the stuffed chicken breast with a little pesto, herb cream cheese, or fresh spinach before filling.• For baking or a lower-fat preparation, the stuffed chicken breast can also be cooked on baking paper in the oven – this keeps it particularly juicy.• The chicken breasts can also be excellently prepared in a pan, ideal for camping or outdoor cooking with a gas stove or gas grill.
Learn more
Flammkuchen pasta
Flammkuchen Pasta meets Pasta – a creamy comfort food for everyone who loves savory dishes! Crispy bacon, golden brown onions and a hint of mustard combine with cream or crème fraîche and cream cheese to create a rich sauce that perfectly coats rigatoni or fusilli. Fresh spring onions provide the finishing kick. Quick to make, uncomplicated and ideal for cozy evenings – tastes like Flammkuchen, but from the pan! Ingredients for 2-3 servings• 250 g pasta (e.g. rigatoni or fusilli)• 150 g diced bacon• 2 onions• 200 ml whipping cream or crème fraîche• 100 g cream cheese (full-fat)• 2 spring onions• 1 tsp mustard (mild or hot, to taste)• Salt & pepper• A little oil or butter for frying• Fresh parsley and grated Parmesan (optional, for sprinkling) Preparation1. Cook pasta• Cook pasta in plenty of salted water until al dente.• Reserve some cooking water.2. Fry bacon & onions• Render diced bacon in a pan without additional fat.• Halve onions, cut into fine rings and add to the bacon. Roast until golden brown.3. Prepare creamy sauce• Deglaze with cream or crème fraîche, stir in cream cheese and mustard.• Simmer over medium heat until a creamy sauce forms.• Season with salt & pepper (bacon is already salty).4. Add pasta & spring onions• Add cooked pasta to the sauce and mix well.• If necessary, add some cooking water to make it nice and creamy.• Cut spring onions into rings and stir in fresh.5. Serve• Serve directly from the pan onto plates and enjoy hot.• Sprinkle with freshly chopped parsley and grated Parmesan as desired. Tip:• If you like it more intense, you can mix in grated Emmental, Gruyère or Parmesan to enhance the flavor.
Learn more
4 pages of Cheeseburger Wrap Recipe - quick and easy
4-Way Cheeseburger Wrap: Everything we love about the cheeseburger – now in a convenient wrap! Juicy ground beef, melted cheddar, fresh iceberg lettuce, and creamy burger sauce come together in a handy package thanks to the clever "four-section trick." Briefly fried in a pan, the wrap becomes crispy on the outside and wonderfully juicy on the inside. Perfect for quick meals, lunch, or as a highlight at a barbecue. Simply prepare, fold, fry – and bon appétit! This cheeseburger wrap combines everything we love about a classic cheeseburger: juicy ground meat, melted cheese, fresh vegetables, and a deliciously seasoned sauce. The "four-section" trick transforms a simple tortilla wrap into a practical, convenient package. Ingredients for 2 Cheeseburger Wraps • 2 large tortilla wraps • 200 g ground beef • Salt & pepper • 2 slices cheddar cheese • 2 tbsp burger sauce or mayonnaise • 2 leaves iceberg lettuce • 2 tomato slices • 2–3 pickle slices (optional) • A little oil or butter for frying Preparation of the Cheeseburger Wraps 1. Brown the ground beef in a pan with a little oil until crumbled, season with salt and pepper. Set aside. 2. Lay the wraps on a board and make a cut from the center to the bottom edge. 3. "Imagine" the wrap in four quarters and distribute the ingredients accordingly: – Quarter 1: Ground beef – Quarter 2: Cheddar cheese – Quarter 3: Pickles – Quarter 4: Iceberg lettuce, tomatoes, and burger sauce 4. Fold the wrap from the bottom right upwards, then continue to the next side until a handy cheeseburger package is formed. 5. Fry the folded cheeseburger wrap in a pan with oil or butter for 2–3 minutes on both sides until crispy and the cheese melts. 6. Serve immediately and enjoy. Additional Tip for Variation and Food Trend For a quick and easy alternative, you can replace the ground beef with grilled chicken, a veggie patty, or pulled pork. These variations are perfect companions for a delicious cheeseburger wrap, which is also wonderfully suited as a food trend for on the go.
Learn more
Easy Curry Bowl Recipes: 3 Delicious Curry Bowls with Curry Paste
3 Curry Bowls Quick, healthy, and full of flavor: This curry comes together in minutes with just three cans and fresh vegetables. The creamy coconut milk combines with savory tomatoes, chickpeas, and red curry paste to create an aromatic sauce that pairs perfectly with rice. Ideal for stressful days, meal prep, or as warming comfort food – without complicated steps and with plenty of room for creative vegetable variations. Ingredients:- Vegetables of your choice (e.g., bell peppers, zucchini, carrots, sweet potatoes)- 1 can chickpeas- 1 can chopped tomatoes- 1 can coconut milk- 2 tsp red curry paste (optional, for more spice)- Spring onions for garnish- Rice or instant rice as a side dish- Oil for frying- Pepper to taste Preparation:- Clean vegetables and cut into bite-sized pieces- Drain chickpeas and rinse briefly- Heat some oil in a pot and sauté the vegetables over medium heat- Add chopped tomatoes, coconut milk, and chickpeas- Optional: Stir in curry paste for a spicier noteSimmer everything over medium heat for about 15–20 minutes until the vegetables are cooked through.Meanwhile, cook rice or heat instant rice. Serve the curry with rice and sprinkle with spring onions. Tip:You can vary the vegetables flexibly – sweet potatoes or spinach are also delicious, for example. This way, you bring more color and vitamins into your curry bowl and variety to your meal plan.
Learn more
Pork Belly Burnt Ends Style Tacos with Avocado Cream
Tacos with Pork Belly Burnt Ends Style with Avocado CreamTacos with Pork Belly Burnt Ends Style with Avocado Cream Crispy pork belly, caramelized with BBQ sauce, meets creamy avocado and fresh lime – a taco that delights all the senses! The combination of flavorful meat, velvety avocado cream, and crisp cherry tomatoes makes this recipe the ultimate street food for your barbecue. Prepared on a plancha, it creates a perfect interplay of smoky aromas and freshness. Ideal for anyone who loves BBQ and is looking for new taste experiences. Ingredients for 14 tacos: For the pork belly: 500g pork belly with or without rind 2.5 tbsp olive oil 100 ml BBQ sauce 2.5 tbsp BBQ rub Or homemade: 2 tsp sweet paprika powder 1 tsp garlic powder 1 tsp onion powder ½ tsp cayenne pepper 2 tablespoons brown sugar 2 tsp salt 1 tsp black pepper For the avocado cream: 2 ripe avocados 2 tbsp lime juice 2 tbsp Greek yogurt 1 clove of garlic salt and pepper For the tacos: 14 small corn tortillas 4-5 cherry tomatoes 2 limes Fresh coriander Preparation: The pork belly should be about 4 cm wide so that it can be cut into slices about 1 cm wide. Mix olive oil with BBQ rub and coat the pork belly with it. Preheat the griddle to medium-high heat. Meanwhile, prepare the avocado cream: Peel and roughly chop the garlic. Puree the avocados with lime juice, yogurt, and garlic in a blender until smooth, and season with salt and pepper. Place the pork belly slices on the preheated plancha and slowly fry them carefully on both sides until golden brown and crispy – about 5–6 minutes per side. Towards the end, brush with BBQ sauce and let it caramelize briefly. Wash the cherry tomatoes and limes, quarter them and set aside. Briefly warm the tortillas on the plancha. Then spread them with avocado cream, top with a slice of pork belly, a piece of cherry tomato, and coriander. Finally, drizzle with lime juice and serve directly from the plancha.
Learn more
Crostini with ribeye steak and salsa fresca from the plancha
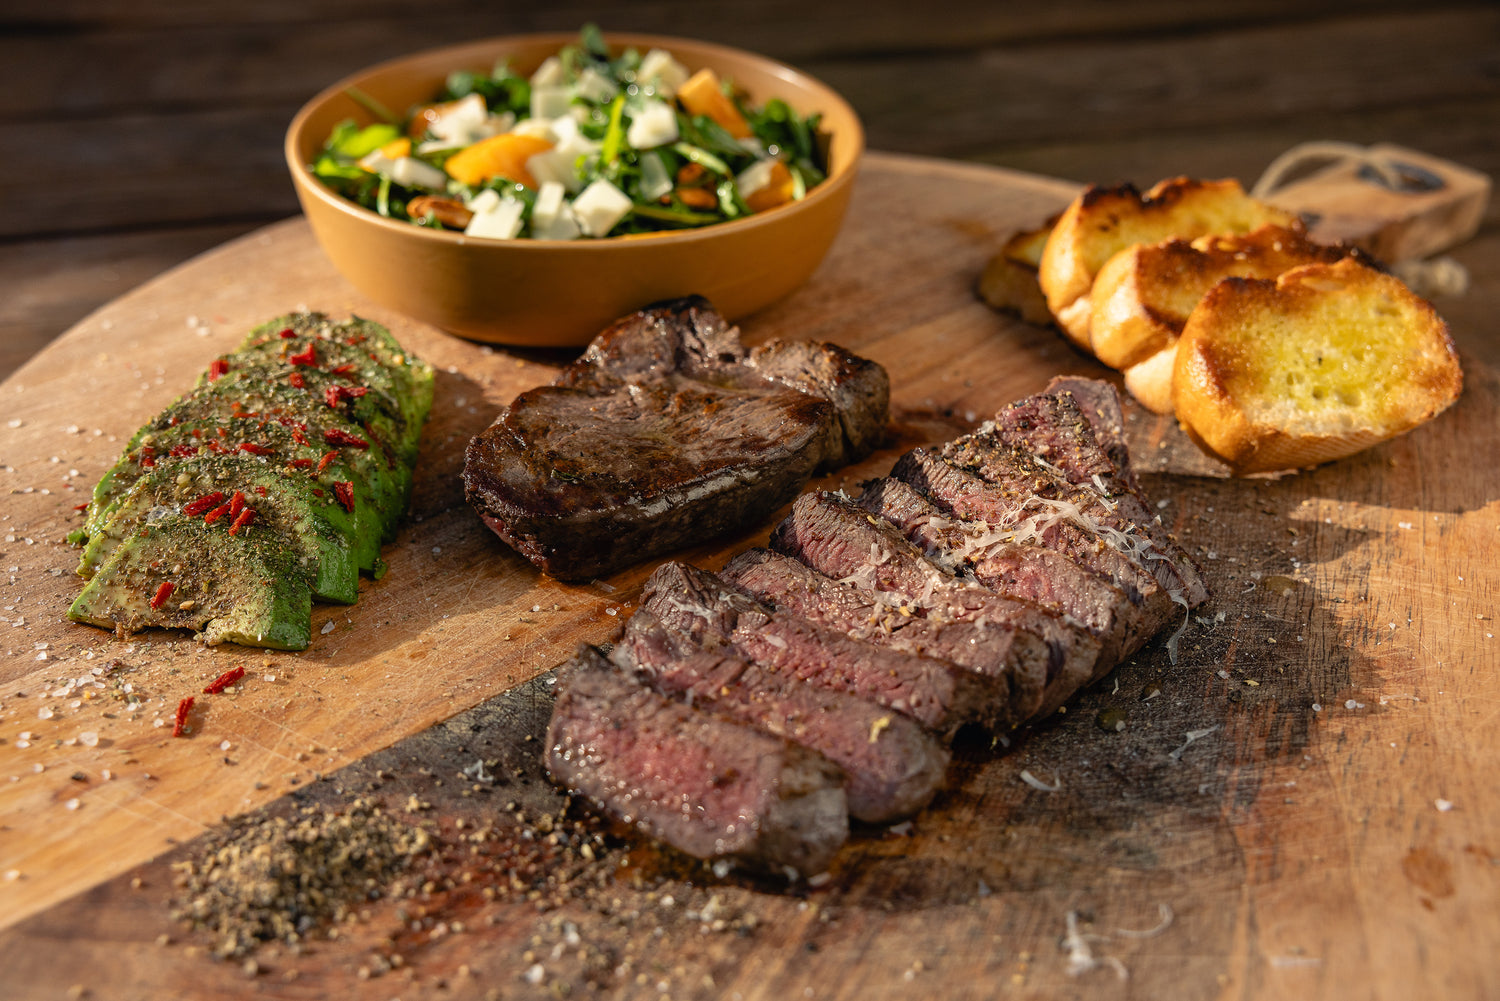
Crostini with Ribeye Steak - Crispy crostini, juicy ribeye steak, and fresh salsa fresca – a treat for all the senses! The combination of tender meat, aromatic garlic bread, and fruity-spicy salsa makes this dish the perfect finger food for barbecue evenings. Grilled on a hot griddle, the steak develops an incomparable roasted aroma, while the crostini on the baguette slices become golden brown and crispy. Ideal as an appetizer or as a highlight for your BBQ party. Ingredients for 2 people For the steak:2 ribeye steaks, 280 g each, approx. 2.5 cm thickOlive oil (virgin olive oil recommended)Flaked salt For the Salsa Fresca:3 tomatoes1 red onion½ yellow chili½ bunch fresh cilantroJuice of ½ lime3 tablespoons virgin olive oilSalt and pepper For the garlic bread:1 baguette1 clove of garlicVirgin olive oil Preparation For the salsa fresca, deseed the tomatoes and cut them into small cubes.Finely chop the onion and chili. Mix with chopped cilantro, lime juice, virgin olive oil, salt, and pepper, then chill. Preheat the griddle to high heat. Rub the room-temperature ribeye steaks with virgin olive oil. Cut the baguette into slices about 2 cm thick and rub with a garlic clove. Place the steaks on the hot griddle and grill for 2 minutes per side, depending on the desired doneness (medium rare at 52–54 °C). Then remove from the grill and place on a cutting board. Drizzle the baguette slices with virgin olive oil and toast until golden brown on both sides. Now slice the steaks, sprinkle with flaked salt, and place on the crostini. Place the salsa fresca on the crostini, arrange a few strips of ribeye steak crostini on top, drizzle with a little lime juice, and enjoy. Optionally, you can refine the crostini with a dollop of Stokes Lemon Mayonnaise or Tonki Kong's Red Onion Marmalade from Ankerkraut – this gives the dish a special touch.
Learn more