

News

Gasgrill winterfest machen: Reinigung, Pflege und Lagerung
Wer seinen Gasgrill winterfest machen will, spart sich im Frühjahr Ärger mit Rost, Fettgeruch und schwergängigen Teilen. Kälte, Feuchtigkeit und ständige Temperaturschwankungen setzen Material, Brennern und Oberflächen über Monate zu. Mit einer gründlichen Reinigung, etwas Pflege und der richtigen Lagerung bleibt der Grill länger funktionsfähig und startet sauber in die neue Saison. Wichtig ist dabei nicht nur das Putzen, sondern auch das sichere Vorbereiten von Gasflasche, Anschlüssen und Standort. So wird aus einer kurzen Herbstpflege ein echter Schutz für die nächste Grillsaison. Natürlich ist dieser Blockbreitag nur für Griller interessant, die im Herbst und Winter nicht grillen :-) Warum du deinen Gasgrill jetzt winterfest machen solltest Wenn du deinen Grill über den Winter einfach stehen lässt, sammelt sich schnell Feuchtigkeit in Ritzen, Brennerumgebung und Fettbereichen. Das fördert Rost, unangenehme Gerüche und im schlimmsten Fall Funktionsprobleme beim nächsten Start. Besonders bei längeren Standzeiten macht es einen spürbaren Unterschied, ob der Grill sauber, trocken und geschützt eingelagert wird. Wer den Grill winterfest macht, verlängert die Lebensdauer der Bauteile und reduziert den Aufwand im Frühjahr deutlich. Gleichzeitig behältst du die Kontrolle über Schlauch, Regler und Rost, bevor kleine Schäden größer werden. Genau deshalb lohnt sich die Vorbereitung jetzt. Was du vor dem Start bereitlegen solltest Für die Vorbereitung brauchst du keine Spezialausrüstung, aber die richtigen Dinge in der richtigen Reihenfolge: Grillbürste, weiche Tücher oder Lappen, warmes Wasser, etwas Spülmittel sowie ein geeignetes Öl oder Pflege-Spray für den Rost. Für hartnäckige Rückstände kann ein Schaber hilfreich sein, wenn er zum Material passt. Verzichte auf sehr aggressive Reiniger, kratzende Schwämme oder ungeeignete Metallwerkzeuge, die Oberflächen beschädigen können. Je schonender du arbeitest, desto besser bleibt der Grill in Form. Praktisch ist es auch, gleich einen trockenen Platz für die Zwischenablage der Teile bereitzustellen. Gasgrill gründlich reinigen Die gründliche Reinigung ist der wichtigste Schritt, wenn du deinen Grill winterfest machen willst. Beginne mit groben Rückständen am Rost und arbeite dich dann nach innen vor. Innenraum, Brennerumgebung und Fettauffangbereiche sollten frei von losem Schmutz, Fett und Asche sein. Für lackierte oder metallische Außenflächen reicht meist warmes Wasser mit etwas Spülmittel und ein weiches Tuch. Wichtig ist, dass nach der Reinigung alles vollständig trocknet. So verhinderst du, dass sich Feuchtigkeit über Monate hält und Korrosion begünstigt. Eine saubere Basis macht auch das spätere Einölen und Einlagern deutlich sinnvoller. Rost vorreinigen und Verkrustungen lösen Bevor du mit Wasser arbeitest, solltest du grobe Reste mit der Grillbürste abnehmen. Das löst eingebrannte Schichten, ohne dass du lange einweichen musst. Bei emaillierten Rosten ist eine passende Bürste mit weichen bis mittelharten Borsten oft die schonendere Wahl, während robuste Stahlroste etwas kräftiger behandelt werden können. Wichtig ist, mit kontrolliertem Druck zu arbeiten und nicht in den Rost „hineinzuschaben“. Wenn Verkrustungen sehr fest sitzen, hilft es, den Grill kurz zu erhitzen bzw. auszubrennen (wir im nächsten Absatz beschrieben), und danach erneut zu bürsten. So entfernst du Rückstände, ohne das Material unnötig zu belasten. Innenraum und Fettauffangschale säubern Im Innenraum sammeln sich Fett, Bratrückstände und lose Partikel, die du vor der Einlagerung entfernen solltest. Arbeite vorsichtig rund um Brenner, Hitzeschilde und Bodenbereiche, damit kein Schmutz in empfindliche Stellen fällt. Eine leere und gereinigte Fettwanne ist besonders wichtig, weil altes Fett im Winter Gerüche entwickeln und Schimmel begünstigen kann. Auch lose Krümel und Aschereste sollten raus, damit sich keine feuchte Schicht bildet. Wenn du danach mit einem leicht feuchten Tuch nachwischst, denk an gründliches Nachtrocknen. Gerade bei längerer Lagerung macht das einen großen Unterschied. Sollte dein Grill das Campingaz InstaClean System haben, empfehlen wir, die Teile der Brennerbox in der Spülmaschine zu reinigen: Dadurch erhältst du das beste Reinigungsergebnis. Außenflächen schonend abwischen Die Außenflächen brauchen meist weniger Aufwand als der Grillinnenraum, sollten aber trotzdem nicht vernachlässigt werden. Warmes Wasser mit etwas Spülmittel reicht in vielen Fällen aus, um Staub, Fettspritzer und oberflächlichen Schmutz zu lösen. Arbeite mit einem weichen Tuch, damit lackierte Flächen, Edelstahl oder beschichtete Teile nicht verkratzen. Anschließend solltest du alle Flächen trockenreiben, auch an Griffen, Seitenablagen und Kanten. So bleibt keine Restfeuchtigkeit zurück, die sich später als Fleck oder Rostansatz bemerkbar macht. Rost ausbrennen und danach pflegen Das Ausbrennen ist eine sinnvolle Ergänzung zur Reinigung, weil eingebrannte Fettreste durch hohe Hitze in trockene Rückstände umgewandelt werden. Dafür muss der Grill bereits grob sauber sein. Danach wird er geschlossen mit voller Hitze betrieben, bis sich die Ablagerungen lösen. Anschließend lässt du den Grill vollständig abkühlen, bevor du den Rost noch einmal bearbeitest. Erst danach werden lose Partikel entfernt. Diese Reihenfolge ist wichtig, damit du nicht mit Fett und Schmutz auf einmal arbeitest und die Oberfläche sauber für die Pflege vorbereitest. So funktioniert das Ausbrennen richtig Schalte den Grill auf volle Hitze und schließe den Deckel, damit die Temperatur im Innenraum ausreichend steigt. So werden Fett- und Essensreste trocken und lassen sich später leichter entfernen. Je nach Verschmutzungsgrad reicht eine kürzere oder längere Phase, aber der Grill sollte dabei stets beaufsichtigt werden. Erst wenn alles deutlich abgekühlt ist, gehst du an den nächsten Schritt. Das schützt dich und verhindert, dass du die noch heiße Oberfläche beschädigst oder verschmutzt. Rost nach dem Ausbrennen abfegen Nach dem Abkühlen entfernst du Asche und feine Partikel mit einer Reinigungsbürste oder einem trockenen Tuch. Dabei geht es nicht mehr um hartnäckige Verkrustungen, sondern um die losen Reste, die nach dem Ausbrennen zurückbleiben. Der Rost sollte am Ende sauber, trocken und frei von Rückständen sein. Genau dieser Zustand ist die richtige Grundlage für den nächsten Schritt: den Schutzfilm gegen Korrosion. Rost einölen und vor Korrosion schützen Ein dünner Ölfilm schützt den Rost während der Lagerzeit vor Feuchtigkeit und damit vor Rostbildung. Besonders bei gusseisernen Rosten ist dieser Schritt wichtig, weil das Material Pflege braucht und auf Wasser empfindlicher reagiert. Auch andere Rostarten profitieren von einem leichten Schutz, solange er nicht zu dick aufgetragen wird. Weniger ist hier mehr: Ein gleichmäßiger, hauchdünner Film reicht aus. Überschüssiges Öl kann klebrig werden oder beim nächsten Einsatz unangenehme Rückstände hinterlassen. Ziel ist Schutz, nicht ein sichtbarer, schwerer Belag. Die Gasflasche und Anschlüsse sicher vorbereiten Bevor der Grill eingelagert wird, solltest du die Gasflasche trennen und sicher verschließen. Achte darauf, dass der Grill drucklos ist und keine Verbindung unkontrolliert offen bleibt. Schlauch, Regler und alle sichtbaren Verbindungen gehören jetzt in die Sichtprüfung: Gibt es Risse, Sprödigkeit oder lockere Stellen? Solche Schäden solltest du vor der nächsten Saison beheben, nicht erst beim ersten Frühjahrsgrillen. Die Gasflasche selbst lagerst du trocken, gut belüftet und nicht in geschlossenen Wohnräumen. So bleibt die Lagerung sicher und übersichtlich. Schlauch und Druckminderer prüfen Ein kurzer Blick reicht oft schon, um Schäden zu erkennen. Achte auf poröse Stellen, Knicke, Risse und lockere Verschraubungen. Gerade nach einer langen Saison ist es sinnvoll, die Teile einmal bewusst in die Hand zu nehmen statt nur darauf zu vertrauen, dass alles noch passt. Beschädigte Komponenten solltest du vor der nächsten Nutzung ersetzen. So vermeidest du unnötige Risiken beim ersten Einsatz im Frühjahr. Gasflasche richtig lagern Die Gasflasche gehört an einen trockenen, überdachten und gut belüfteten Ort. Wichtig ist, dass sie standsicher aufgestellt und vor direkter Witterung geschützt ist. Vermeide Lagerorte, die zu warm, zu eng oder schlecht belüftet sind. So bleibt die Flasche sicher getrennt vom Grill und kann über den Winter kontrolliert aufbewahrt werden. Wenn du unsicher bist, orientiere dich immer an den Hinweisen des Herstellers und an den geltenden Sicherheitsvorgaben. Den richtigen Winterstandort wählen Der beste Lagerort ist trocken, geschützt und möglichst temperaturstabil. Eine Garage oder ein Schuppen kann gut geeignet sein, wenn dort keine dauerhafte Feuchtigkeit entsteht. Ein Keller ist nur dann sinnvoll, wenn er trocken und belüftet ist. Auf der überdachten Terrasse kann der Grill ebenfalls stehen, wenn er sauber, trocken und zuverlässig abgedeckt ist. Für die Außenlagerung ist eine passende Hülle wichtig, die den Grill vollständig schützt und zugleich nicht alles luftdicht einschließt. Entscheidend ist, dass sich keine Nässe staut. Drinnen lagern Im Inneren steht der Grill deutlich geschützter vor Wind, Niederschlag und direkter Frostbelastung. Ein trockener, windgeschützter Ort ist deshalb meist die angenehmste Lösung. Vor dem Einräumen muss der Grill aber vollständig sauber und trocken sein, sonst holst du die Feuchtigkeit mit hinein. Auch der Platz selbst sollte frei von Spritzwasser, Leckagen oder starkem Kondensationsrisiko sein. Nur so bringt das Einlagern im Innenbereich echten Vorteil. Draußen lagern mit Abdeckhaube Wenn der Grill draußen bleiben muss, sollte die Abdeckhaube vollständig abdecken und fest sitzen. Sie darf weder verrutschen noch an einer Stelle offen bleiben, an der Regen oder Schnee eindringen können. Gleichzeitig ist Luftzirkulation wichtig, damit sich unter der Abdeckung keine Feuchtigkeit staut. Eine gute Schutzlösung hält Schmutz, Niederschlag und Staub fern, ohne den Grill in einen feuchten Abschluss zu sperren. So lässt sich der Grill auch draußen ordentlich überwintern. Feuchtigkeit, Rost und Schimmel vermeiden Kondenswasser ist im Winter oft die größte Gefahr, weil es sich unbemerkt an kalten Metallflächen sammelt. Deshalb sollte der Grill vor der Lagerung komplett trocken sein und nicht direkt auf feuchtem Untergrund stehen. Hilfreich ist auch, den Standort gelegentlich zu kontrollieren: Ist die Haube verrutscht, hat sich Wasser gesammelt oder fühlt sich der Innenraum wieder feucht an? Schon kleine Feuchtigkeitsquellen können über Wochen Probleme machen. Wer aufmerksam bleibt, schützt Rost, Brennerumgebung und Zubehör deutlich besser. Wann du den Gasgrill wieder prüfen solltest Vor dem ersten Grillen im Frühjahr lohnt sich eine kurze Kontrolle: Ist der Rost sauber und trocken, sehen Brenner und Flammenbild unauffällig aus, sitzen Schlauch und Anschlüsse fest? Auch die allgemeine Funktion des Grills sollte einmal geprüft werden, bevor du wieder voll loslegst. Wenn alles in Ordnung ist, kann die neue Saison entspannt starten. Falls du Abdeckungen oder Schutzhüllen nutzt, ist jetzt auch der Moment, den Zustand des Grills nach der Winterpause nochmal genau anzusehen. Wir wünschen dir viel Erfolg beim Einlagern deinen Gasgrills. Die Vorfreude auf das Auspacken im Früher ist dann umso höher.
Learn more
Guide - Camping Stoves, Gas Bottles & Gas Cartridges Explained Simply
Camping with Gas: Why We've Trusted This Energy Source for Over 75 Years Anyone who camps regularly knows the feeling: the first coffee in the morning, breakfast in front of the caravan, or a warm dinner after a long hike are among the most beautiful moments outdoors. For these moments to happen effortlessly, one thing is essential – a reliable energy source. That's precisely why at Campingaz, we've been dealing with gas since 1949. What began as an idea to make camping easier and more independent has now become second nature to millions of outdoor enthusiasts worldwide: mobile cooking, grilling, and heating with gas. Check out our guide to handling gas appliances. Why Gas is the First Choice for Camping When customers ask us why camping stoves and gas grills are still the most popular solution for on-the-go, the answer is simple: gas combines convenience, performance, and reliability like hardly any other energy source. A gas appliance is ready for use within seconds. The flame can be precisely regulated, power is immediately available, and there's little effort involved in its use. Whether for a weekend trip, at the campsite, or trekking in the mountains – with gas, you can cook whenever and wherever you want. Check out our guide to handling gas appliances. Especially for campers who value flexibility, gas offers a decisive advantage: the energy is mobile and available almost anywhere. The Most Important Question Before Buying: Gas Cylinder or Gas Cartridge? One of the most frequently asked questions we receive at Campingaz is: "Should I use a gas cylinder or a gas cartridge?" The answer depends on how you travel. Gas Cartridges: For Those Who Want to Travel Light and Flexibly Those who travel with a backpack, plan a bike tour, or are only away for a weekend benefit from the advantages of modern gas cartridges. They are light, compact, and quickly ready for use. Our valve cartridges, in particular, offer additional convenience as they can be detached from the device at any time and reconnected later – even if they are not yet completely empty. Check out our guide to handling gas appliances. For many hikers, festival-goers, and trekkers, gas cartridges are therefore the ideal solution. Gas Cylinders: The Best Choice for Longer Camping Holidays Those who camp regularly, travel with family, or use a powerful camping stove or grill usually opt for a gas cylinder. The big advantage lies in the long operating time and the Europe-wide exchange system. An empty Campingaz gas cylinder can be exchanged for a full one in many European countries. This makes it ideal for longer journeys and extended camping stays. For many of our long-term customers, precisely this combination of economy and flexibility is one of the main reasons why they have relied on Campingaz for years. Campingaz offers Europe-wide availability of gas cartridges and gas cylinders. Find dealers in our dealer search. Not All Gas is the Same Another aspect that is often underestimated is the composition of the gas. Many campers know the terms propane, butane, or isobutane but don't know exactly what the differences are. Butane is excellent for warmer temperatures and allows for particularly compact cartridges. Propane, on the other hand, works reliably even at low temperatures and offers high performance. Isobutane combines the advantages of both variants and shows improved performance, especially in cooler conditions. Therefore, modern camping gas cartridges often use specially formulated gas mixtures to deliver optimal results in as many applications as possible. For year-round use, for example, we offer special all-season solutions that enable reliable performance even at low temperatures. Safety Always Comes First As a manufacturer of gas appliances, we know: comfort and performance are important – safety is indispensable. Therefore, we recommend every user familiarize themselves with their energy source before first use. As a basic rule: Use gas appliances exclusively outdoors Always position cartridges and cylinders securely and as upright as possible Regularly check all connections for leaks Inspect hoses and regulators for damage Never use gas in enclosed spaces Protect gas containers from direct sunlight and heat These simple rules ensure that camping with gas remains safe, comfortable, and carefree. Which Camping Stove Suits Your Adventure? The perfect solution always depends on how you travel. For solo adventurers and minimalists, a compact 1-burner stove with a cartridge is often sufficient. Families and campers who cook regularly benefit from multi-burner camping stoves with a larger cooking surface. And those who want to enjoy outdoor life to the fullest rely on multifunctional devices for cooking, grilling, and frying. These offer maximum flexibility and quickly transform the campsite into a fully equipped outdoor kitchen. Here you will find a large selection of gas camping stoves. Our Conclusion: The Right Energy Source Makes all the Difference For more than seven decades, we have been developing solutions that make camping simpler, more comfortable, and more independent. This experience has shown us one thing: The best energy source is the one that fits your adventure. Whether it's a compact gas cartridge for a weekend trip, a powerful gas cylinder for a family holiday, or a versatile camping stove for the outdoor kitchen – with the right solution, a simple camping trip becomes a real experience. Check out our selection of gas cartridges and cylinders. Because one thing hasn't changed since 1949: It simply tastes best outdoors.
Learn more
Power outage, emergency power supply: The ultimate checklist
Power Outage, Emergency Preparedness: The Ultimate Checklist A sudden power outage can quickly bring everyday life to a standstill – from lighting to cooking, nothing is as it usually is. Especially during longer outages, well-thought-out emergency provisions are essential to ensure safety and comfort. But how can you best prepare for such a power outage, and what should be included in your power outage emergency kit? This ultimate checklist will help you optimally manage the next power outage and provides practical solutions and equipment for crisis times. Emergency Preparedness for Power Outages: Preparation is Key Why Comprehensive Emergency Preparedness is Important Power outages – whether a regional blackout or a short-term power failure – are unpredictable. Solid crisis preparedness prevents stress and uncertainty when the power suddenly goes out. Without electricity, many of our everyday appliances don't work: refrigerators, stoves, heating, lights, and communication are immediately affected. That's why it's worthwhile to start preparing for a power outage early. Important Components of an Emergency Kit Emergency Kit: Basic equipment with flashlights, batteries, candles & lighter Emergency Equipment: Gas stove, gas lamp, gas cartridge, power station or generator for mobile energy supply Communication Devices: Cell phone, battery-powered radio (e.g., crank radio), and fully charged power banks Water supplies and non-perishable food, drinks Medications and first aid kit as well as a first aid kit Hygiene articles and disinfectants How to Prepare Your Home for a Blackout Blackout Preparedness for Home – The Basics To avoid being unprepared at home during a power outage, you should think about a safe and comfortable basic setup. This primarily includes securing the energy supply, for example, with a generator or a power station. These devices temporarily supply important electrical appliances such as refrigerators or internet routers with power from the grid. What to Do During a Power Outage at Home? When a power outage occurs, measured action is crucial. Stay calm and inform yourself about the situation with a battery-powered radio or the warning app. Avoid unnecessarily opening refrigerators and freezers to keep food and drinks fresh longer. Turn off unnecessary devices to relieve the emergency power supply. For emergencies, a power outage emergency kit should also be readily available. Cooking Without Electricity: Practical Tips and Equipment Gas Stoves and Cartridge Stoves – Indispensable Helpers If you don't want to do without warm meals in the dark, you should consider cooking without electricity. Gas stoves and cartridge stoves are compact, practical cooking devices that can be easily operated with gas. They are quickly ready for use, require no electricity, and are ideal for use during blackouts or longer power outages. Campingaz CV stoves are operated with the CV470 gas cartridge, which is available not only throughout Germany but also across Europe at tens of thousands of retailers. Coleman gasoline stoves are also worth mentioning, as they can be operated with commercial gasoline. With both types of stoves, whether gas or gasoline-powered, you can cook for hours or even generate warmth for a small radius. Alternative Lighting: Gas Lantern and Candles A gas lantern not only provides light but also creates atmosphere in a dark environment. Here too, Campingaz models are very flexible, as the CV cartridge is available throughout Europe. The gasoline-powered Northstar Lantern by Coleman is also practical, as it runs on gasoline. Candles are also part of the basic equipment of every power outage emergency kit and can reliably provide light in combination with lighters or matches. Additionally, flashlights with spare parts are also excellent for mobile lighting. Emergency Equipment for Daily Needs What Belongs in the Perfect Emergency Kit? Supplies of drinking water, beverages, and non-perishable food Medications, wound dressings, and personal hygiene articles as well as disinfectants Battery-powered flashlight, spare batteries, and power bank Multi-tool and lighters/matches Thermal blankets and weatherproof clothing Gas or gasoline stove and the corresponding energy source Important when selecting emergency equipment:The equipment should be designed for the individual needs of household members – especially if small children, elderly people, or people with chronic illnesses live in the household. Pets should also not be forgotten: their care is part of comprehensive crisis preparedness. Electrical Backup Options: Power Station and Generator Power Station as a Flexible Energy Source A power station offers a clean and quiet alternative to a classic generator, supplying small to medium-sized electrical devices with power from independent batteries. It is mobile, odorless, and particularly suitable for powering smartphones, laptops, or LED lights. The Generator – Powerful Energy Supply For longer outages and larger consumers, a generator is suitable. These devices generate electricity using internal combustion engines and power refrigerators, heaters, and other household appliances. Caution: Good ventilation is important for operation, and safety precautions regarding exhaust gases must be observed. Communication and Safety During a Power Outage Receiving Information Despite a Power Outage True emergency preparedness also includes access to information. A battery-powered or crank radio allows you to receive important news and warnings even without electricity. What to Do if Mobile Networks Are Restricted? Network capacities are quickly overloaded during blackouts. Therefore, it is advisable to keep important phone numbers on paper and to arrange meeting points with the family. A pre-prepared emergency plan also ensures safety and quick coordination during crisis times. Summary and Further Tips Well-thought-out emergency preparedness is essential to safely and stress-free get through a power outage or a longer blackout. The right combination of an emergency kit, food supplies, lighting like a gas lantern, cooking equipment (gas stove/gasoline stove), and energy backup solutions (power station, generator) makes all the difference. Inform yourself early about what is important for your home and put together an individual power outage emergency kit. This way, you will be optimally prepared for an emergency.
Learn more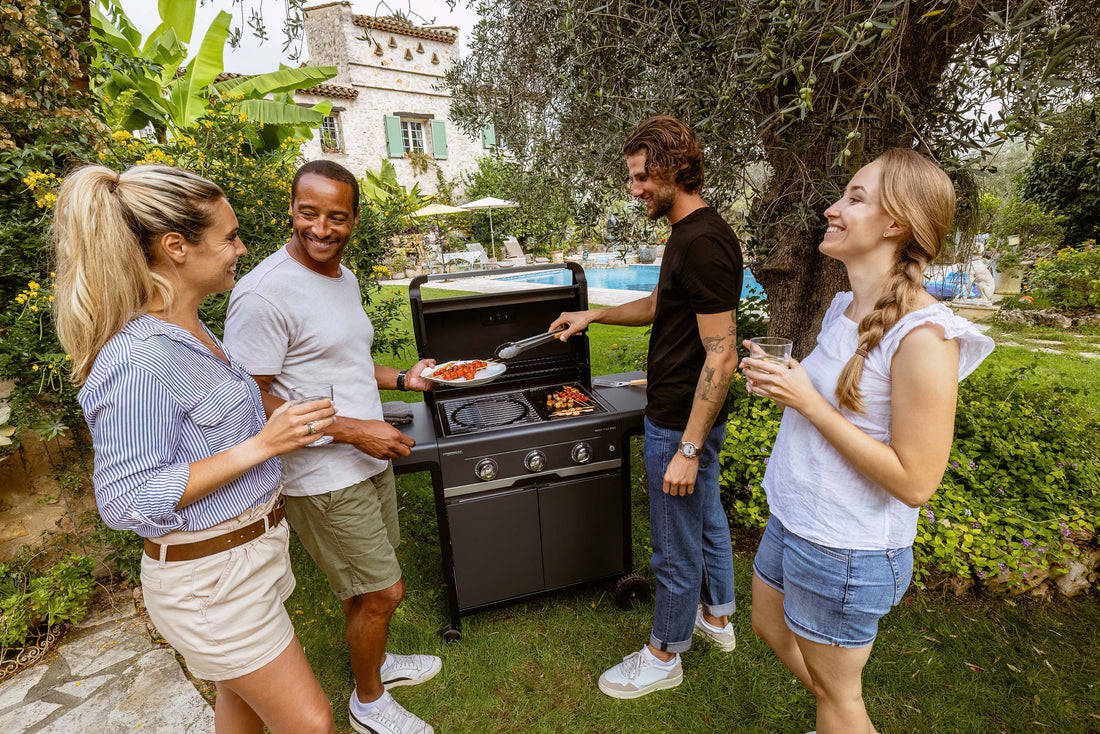
Gas grill buying guide: The 6 most important tips for your perfect grill
Are you planning to buy a gas barbecue but are unsure what really matters? Our gas barbecue buying guide provides valuable orientation so you can find the right model for your needs. Whether you're a beginner or an experienced grill master, choosing the right gas barbecue determines your grilling enjoyment and the results. In this article, you'll get the 6 most important tips on features, equipment, and buying criteria for a perfect purchase. This way, you'll be well prepared to make your next grilling experience a real highlight. 1. Gas Barbecue Buying Guide: Why a targeted selection is crucial Clarify your needs and type of use Before you start your search, you should be clear about your requirements. A good gas barbecue buying guide always starts with the question: For whom and how often do you want to barbecue? Smaller models are ideal for singles or couples, while larger gas barbecue carts are suitable for families and parties with many guests. Are you planning to do indirect grilling or even rotisserie cooking in addition to quick direct grilling? The more precisely you know your needs, the easier it will be to choose the right barbecue. Consider space and location Where will your gas barbecue be located – on the balcony, terrace, or in the garden? For small spaces, portable or compact models like built-in gas barbecues are ideal. Large barbecues require sufficient space and protection from wind, and the gas cylinder should also be safely stored. Mobility also plays a role if you want to transport the barbecue regularly. All these factors influence the optimal size and equipment. 2. The Equipment: Important functions for more grilling comfort Number of burners and power The number of burners determines how flexibly you can control the heat on the cooking surface. Several separately adjustable cooking zones allow for zones with different temperatures – perfect for direct and indirect grilling. The power in kilowatts should match the barbecue volume: approximately 2 to 4 kW per burner, so you can quickly reach temperature. All Campingaz gas barbecues fulfill this requirement. Special features and accessories Many Campingaz gas barbecues offer practical features such as a rear burner or side burner for side dishes, a back burner, and even infrared burners for particularly high temperatures. Fold-down side tables for additional space and base cabinets for gas cylinders and accessories further increase comfort. Consider which features suit your grilling habits – they make handling easier and expand your possibilities. 3. Material quality and workmanship – durable and easy to maintain Robust components The durability of your gas barbecue depends heavily on the material. Our higher-priced gas barbecues are particularly weather-resistant, rust-free, and easy to clean. A double-walled lid stores heat well and ensures even grilling. Grill grates: Cast iron vs. steel Steel grates: Easy to clean, rust-resistant – ideal for all-round grillers. Cast iron grates: Excellent heat retention and grill marks, and our Culinary Modular System is only available as a cast iron grate. Depending on your grilling style, you should choose consciously here. 4. Keep price-performance in focus What does a good gas barbecue cost? Campingaz gas barbecues are available in many price ranges. Entry-level devices start at around 200-300 Euros, while our top models cost between 500 and 900 Euros. It is important not to just look at the price, but also at the features you want. How to use your budget wisely Consider exactly which features you really need. Remember that higher-quality barbecues last longer and require less frequent repairs. 5. Safety and legal requirements CE marking and test seals All Campingaz gas barbecues have a CE marking. This confirms compliance with European safety standards. Handling gas cylinders and gas pressure regulators All Campingaz gas barbecues are already equipped with a gas hose and gas pressure regulator – all of course of tested and high quality. Make sure your gas cylinder is safely connected and regularly checked. 6. Practical buying tips for beginners and advanced users Pay attention to the best buying criteria Test how easy it is to regulate the temperature and how quickly the barbecue heats up. Look for easy cleaning – removable grease trays and removable parts are a plus. Choose the right grilling surface – too small means bottlenecks, too large wastes space. Consider whether you want to use the barbecue мобильно or if it will be permanently stationary. Also consider the grill grates and whether you want to use infrared burners or a rotisserie for special grilling methods. Conclusion: The right gas barbecue buying guide takes into account your individual needs, equipment, material quality, price-performance, and safety. Whether you're just starting out or are an experienced griller – with these 6 tips, you're perfectly equipped for your next gas barbecue purchase. Discover the right selection in our online shop and start your perfect grilling adventure today!
Learn more
Gas grill in autumn: 7 tips for perfect grilling in cool weather
Firing up a gas grill in the fall might sound strange to you at first. But that's exactly what makes grilling in the cooler season so special: no summer heat, just a cozy atmosphere and delicious, seasonal ingredients. With the right tips, you can truly enjoy your fall barbecue on a gas grill—whether you're sitting on the patio with friends or enjoying a relaxing evening outdoors. Let's discover together how to take your next-level gas grill fall barbecue to the next level! Why the gas grill is indispensable in autumn Ready for use quickly in cool temperatures In autumn, it can get chilly quickly, especially during evening barbecues. This is where the gas grill shows its strengths: It's ready for use quickly and delivers consistent heat, allowing you to easily balance the cool temperatures. No mess with wood or charcoal, just direct grilling with precise temperature control. Advantages over other types of grills Especially if you're out and about in the fall or perhaps need a portable grill, the gas grill's versatility is impressive. It doesn't require long preparation times and is easier to use than charcoal or an open fire. This leaves you more time to enjoy the fun of grilling. 7 tips for perfect grilling in cool autumn weather 1. Use the right clothing and atmosphere Dress warmly and equip your barbecue area with blankets and perhaps windbreaks. Fairy lights or a fire pit complement the ambiance and make grilling a real highlight – even when it's chilly outside. 2. Pay attention to the wind and weather conditions Set up your gas grill somewhere sheltered from the wind so the flame stays steady and the heat stays well. A covered area or a party tent will also help if the fall rains. 3. Pro tip for temperature: Patience pays off Even though the gas grill heats up quickly, you should still give it a few minutes to heat up properly. This ensures perfect searing and a nice crust on your grilled food without sticking. 4. Cleverly combine seasonal ingredients Autumn grilling isn't just about meat – the gas grill is ideal for preparing fresh autumn vegetables like pumpkin, mushrooms, or sweet potatoes. These ingredients develop their full flavor particularly well at medium heat and short cooking times. 5. Grill with indirect heat for larger dishes Place larger pieces of meat or vegetables on the indirect cooking zone of your gas grill with the lid closed. This will make them tender and juicy—ideal for autumn barbecues with pulled pork, poultry, or roasts. 6. Use marinades and spices according to the season Season with flavors like honey, cinnamon, paprika, or fresh herbs. They emphasize the autumnal flair and give your grilled food a delicious, spicy finish—perfect for gas grill dishes in cool weather. 7. Portable grill for spontaneous grilling fun For excursions or spontaneous barbecues on the go, a portable gas grill is simply ideal. It's quick to set up, easy to transport, and still delivers a strong flavor – making fall grilling a lot of fun, no matter where you are. Autumn barbecue recipes: Inspiration for your gas grill Grilled pumpkin with honey and thyme Slice Hokkaido or butternut squash, brush them with honey and olive oil, season with thyme, and roast them directly on the grill over medium heat. The sweet flavor and the smoky aroma from the gas grill make a wonderful combination. Grilled mushrooms in garlic butter Clean the mushrooms and brush them with homemade garlic and herb butter. Place them briefly on the gas grill until they are nicely browned – a perfect side dish or small snack for your barbecue. Proper care for your gas grill in autumn Cleaning before and after grilling Cleanliness not only ensures the best flavor, but also extends the lifespan of your gas grill. It's important to thoroughly clean the grate after each use and protect the grill from moisture during longer breaks. Winterizing – how to keep your gas grill in good shape Autumn is the time when you should store your gas grill especially carefully. Cover it with a suitable cover, store it in a dry place, and regularly check the condition of the gas cylinder and connections. Gas grilling – rediscover the joys of autumn With a gas grill, grilling in the fall is truly fun and more versatile than you might think. Whether it's cozy evenings with friends, spontaneous picnics thanks to a portable grill, or trying out seasonal recipes – now is the perfect time to create new grilling moments. Use these tips for optimal preparation, safe operation, and creative grilling ideas to make your fall barbecue a pleasure. Give it a try, enjoy the colorful season, and discover how versatile a gas grill can be in the fall!
Learn more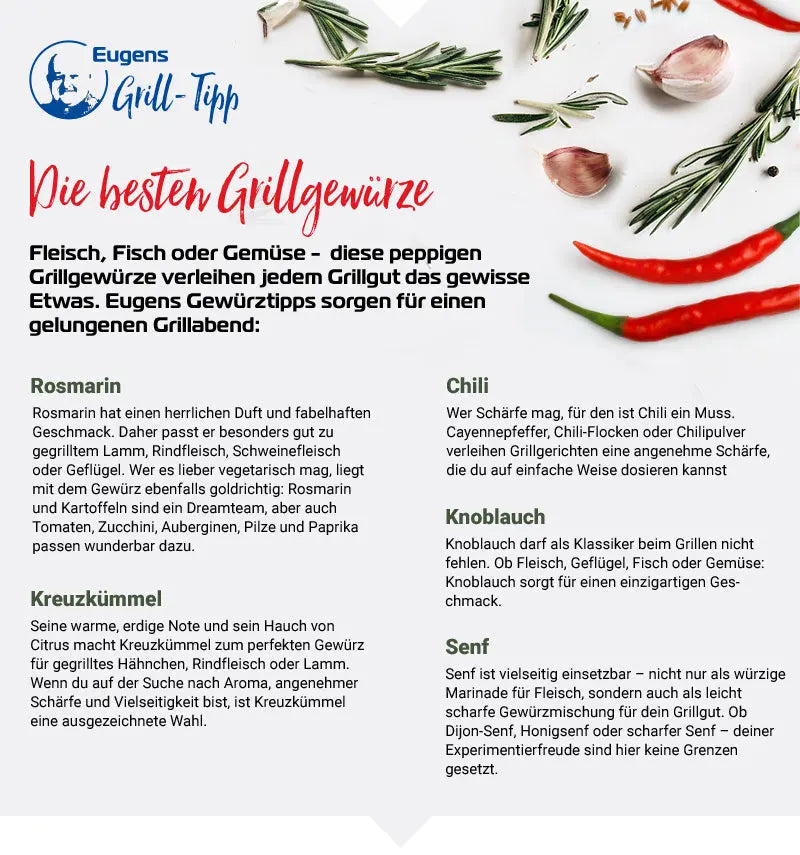
Grilling Tip: The Best Grill Spices and Seasoning Mixes for Flavoring
Grilling Tip: The Best Grill Spices and Spice Blends for Seasoning To take your grilled food to the next level of flavor, you need the right grill spices and a suitable spice blend for seasoning. In particular, bbq rubs or simply rubs are an excellent choice, as they not only season meat like pork neck, ribs, or pulled pork but also create an aromatic crust. What are BBQ Rubs and How Do They Work? A bbq rub is a spice blend usually applied dry to the meat. Classic ingredients include salt, paprika powder, cumin, and various dried herbs. A well-known example is "Magic Dust," a popular rub that combines sweet and savory notes and is particularly suitable for pork neck and pulled pork. Tips for Using Grill Spices For an intense aroma, the spices should be generously and evenly distributed on the grilled food. Especially with long cooking times, as in the Low & Slow method, rubs unleash their full potential. The spice blend should marinate for at least 30 minutes before grilling, but ideally for several hours. Popular Spice Blends for Seasoning Magic Dust – for a balanced aroma with a subtle spiciness. Classic BBQ rub with paprika powder and cumin – perfect for beef and pork. Sweet rubs with sugar and cinnamon – enhance pulled pork and chicken. Salty rubs with sea salt and garlic – provide a strong seasoning. Conclusion: How to Find the Best Grill Spices The best grill spices are those that match the specific grilled food and desired taste. Whether savory, spicy, or sweet – a high-quality spice blend and proper application are key to perfect grilled food. Those who experiment will quickly find their personal favorite blend of rubs and BBQ rubs.
Learn more
Grilling Tip: Grill Sauce Recipes & Preparation Time – Top 5 Ideas
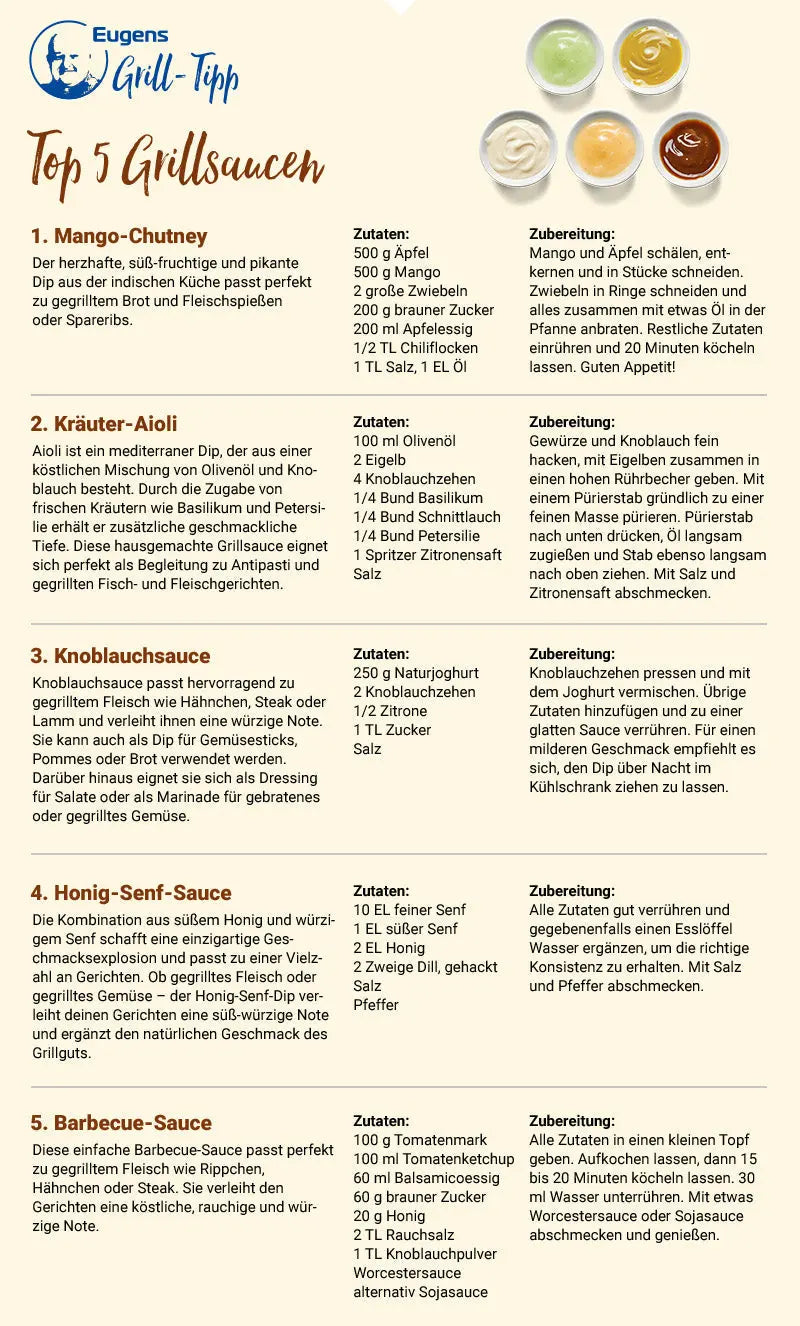
Grill Tip: Top 5 BBQ Sauce Recipes with Preparation Times A successful barbecue evening isn't just about the perfect grilled food, but also about the right BBQ sauces. With our BBQ sauce recipes and the indicated preparation times, you can easily make your own barbecue sauce and offer your guests diverse taste experiences. 1. Classic Barbecue Sauce – Basic Recipe The basic recipe for a barbecue sauce includes brown sugar, apple cider vinegar, and garlic cloves, among other ingredients. The combination of these ingredients gives the sauce a balanced sweetness and slight acidity – perfect for grilled meat. Preparation time: approx. 20 minutes. 2. Mango-Curry Dip: Exotic and Spicy For fans of fruity and spicy sauces, the mango-curry dip is a highlight. Besides fresh mango, it also contains curry powder and fresh lemon juice, which gives it an exotic note. Especially delicious with grilled poultry or fish. Preparation time: approx. 15 minutes. 3. Guacamole Dip – Cream Cheese Meets Avocado For a light dip, the combination of avocado, cream cheese, and a squeeze of lemon juice is excellent. Season with salt and pepper and enjoy the dip with grilled vegetables or as a fresh side dish for your barbecue party. Preparation time: approx. 10 minutes. 4. Spicy BBQ Sauce with Garlic and Brown Sugar For lovers of intense flavors, a sauce with garlic cloves, brown sugar, and some apple cider vinegar is ideal. These homemade BBQ sauces pair perfectly with beef and savory grilled food. Preparation time: approx. 25 minutes. 5. Quick and Delicious: Basic Recipe for Homemade BBQ Sauces If time is short, simple recipes with few ingredients like salt and pepper, apple cider vinegar, and a little brown sugar are ideal. This variation is quickly mixed and keeps well in the refrigerator – perfect for spontaneous barbecue evenings. Preparation time: approx. 5 minutes. With these grilling recipes and tips for sauces, your next barbecue evening will be a success with versatile taste compositions. Try the homemade BBQ sauce variations and surprise your guests with creative dips and sauces that perfectly complement your grilled food.
Learn more
Tender and juicy meat from the gas grill
Tender and Juicy Meat from the Gas Grill Grilling meat on a gas grill is one of the most popular summer activities in Germany. To enjoy truly tender and juicy grilled meat, not only grilling technique but also the selection of meat cuts and meat quality are crucial. In this guide, we provide professional tips on how to grill your meat correctly and which grilled meat cuts are particularly well-suited for the gas grill. The Best Types of Meat for the Gas Grill Whether it's a juicy steak, tender beef fillet, or flavorful pork neck – the most popular types of meat for the gas grill are characterized by high meat quality and suitable grill meat cuts. For beef, for example, cuts like Dry Aged Beef or Wet Aged Beef are very popular. These aging methods ensure particularly tender and aromatic meat. Similarly, pork cuts such as pork neck or spare ribs are perfectly suited for indirect grilling on the gas grill. Consider Meat Quality and Origin Those who value grilled meat from species-appropriate animal husbandry should look for certifications and regional offers when buying grilled meat. The meat counter in specialized stores also often offers high-quality grilled meat from sustainable production. Meat quality has a great influence on the taste experience and the tenderness of the grilled meat. Preparation: Marinating and Storing Grilled Meat Correctly To ensure the meat retains its juiciness, it is advisable to marinate the grilled meat before preparing it. Suitable grilled meat marinade recipes not only enhance the flavor but also help to make the meat particularly tender. After purchase, it is important to freeze the grilled meat correctly if it is not used immediately. This preserves the structure and maintains high quality. Optimal Grilling Technique for Tender Meat on the Gas Grill Proper grilling is crucial for a juicy steak or tender poultry. Using the Sizzle Zone – the particularly hot zone on the gas grill – is ideal for achieving a crispy crust. For gentle cooking, the grilling method in the indirect area of the grill is recommended, so that the meat cooks slowly and evenly and remains tender. Practical Aids for the Perfect Doneness A good grill thermometer helps to determine the ideal core temperature for different types of meat and thus avoid overcooking. Whether it's tender beef fillet, crispy chicken wings, or Pulled Pork Texas Style – with the right thermometer, the meat will turn out perfectly. Discover Diverse Grilling Recipes and Grilling Courses Whether classic Pulled Pork, Picanha from the grill, or creative grilled meat recipes – there are numerous ways to use the gas grill in a varied manner. For those who want to perfect their grilling technique, grilling courses offer valuable professional tips on grilling meat and preparing grilled meat correctly.
Learn more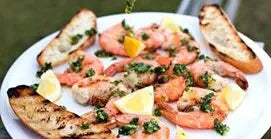
Eugen's grill tip: DIY dips and marinades
Eugen's grill tip powered by Campingaz: DIY dips and marinades With marinades and dips, you can easily conjure up a great flavor experience and experiment as you please. In his grilling tip, Eugen has compiled three of his favorite basic recipes that are quick and easy to make. Just give them a try! Herbal oil as the icing on the cake It's one of the basic toppings – herb oil. It tastes simply divine and goes well with virtually anything you grill, whether it's meat, shrimp, or vegetables. Here's how to conjure up this delicious oil: • 1 handful of flat-leaf parsley • Juice of one lemon • about 6 tablespoons of sunflower or olive oil • Salt, white pepper • 1-2 cloves of garlic Combine all ingredients in a narrow container and blend. Eugen's pro tip: Let the herb oil rest for at least an hour. Simply pour it over the still-hot food after grilling – and you're done! Instead of parsley, you can also use other fresh herbs, such as basil, thyme, or rosemary, depending on your taste. Marinade for meat lovers This marinade is simply perfect for steaks and is quick and easy to make. You'll need: • 1 clove of garlic • 1 tbsp thyme • ½ tbsp chili powder • ½ tsp black pepper • 1 teaspoon sugar • ½ tbsp salt Crush the garlic with a pinch of salt in a mortar and pestle until it forms a paste. Add the remaining spices to the garlic paste. Place the steak or other food you're grilling in a deep plate and spread the paste over it. Cover with cling film and refrigerate for at least 2 hours, or preferably overnight. Eugen recommends taking the marinated meat out of the refrigerator for about an hour before grilling to avoid thermal shock. Aioli à la Eugen Garlic cream is a popular classic dip. And rightly so, says Eugen. Simply with fresh baguette, with vegetables, or grilled meat or fish—perfect! Good to know: Aioli keeps in the refrigerator for about a week, making it perfect for multiple barbecues. • 2 egg yolks • 2-3 cloves of garlic • approx. 300 ml sunflower oil • 1 tablespoon honey • 1 tablespoon mustard • Juice of one lemon • Salt and pepper (as needed) For a successful aioli, all ingredients should be at the same temperature. Add everything to a large, narrow container with a little salt and pepper to start with, and let it stand for a while so the ingredients reach roughly the same temperature and the aioli doesn't curdle. Take a hand mixer and set it at the bottom of the container on the lowest setting. Slowly pull the mixer up until all the oil is incorporated. If your mixer doesn't have a speed control, don't mix the ingredients, just pulse the mixer in two-second intervals. Season with salt and pepper as desired, then chill in the refrigerator until ready to serve. Done.
Learn more
Coal, gas or both?
Charcoal, gas or both? We asked around For our community, he's a stalwart: our Eugen. With his grilling tips, he not only enriches our newsletter but also ensures a lot of variety on the grill grate. We spoke with him about the differences between charcoal and gas grills, the pros and cons of both types of grilling, the dos and don'ts of grilling, and his personal grilling preferences. Campingaz: Dear Eugen, you're a real grilling pro. What do you prefer to grill with? Eugen: Personally, I grill on both gas and charcoal grills. When I'm in a hurry, especially during the week, I primarily use my gas grill. I'm simply more flexible with it. But when I have more time, I also grill on a classic charcoal grill. Campingaz: That brings us directly to the next point. Can you tell us more about the biggest differences and advantages and disadvantages of the two types of grills? Eugen: In principle, the biggest difference is the type of fuel. With a charcoal grill, you also need a bit more equipment, such as firelighters, a chimney starter, or a lighter. A gas grill has clear advantages here: all you need is a gas bottle or gas cartridge, which is ignited with a piezo ignition – so no lighter is needed. Grilling with gas is also faster: the heat is immediately available, and I can put the food directly on the grill grate. With a charcoal grill, it takes about half an hour for the charcoal to reach the right temperature. Cooling down also takes longer. A gas grill, on the other hand, cools down very quickly after being turned off, and the temperature can be precisely controlled with the individual burners. Both types of grills are portable as they don't require a power source. However, it should be noted that on many campsites or in the wild, charcoal grilling can be prohibited – especially during dry summer months – due to the risk of sparks. This is not the case with a gas grill for safety reasons. Another plus point for gas grills is the convenience of cleaning: especially when on the go, charcoal grills are often impractical to clean. Gas grills usually have a water-filled grease drip tray, which makes it easier to catch dripping grease. You simply pour out the water, wipe the grill grate, and store the gas grill cleanly and quickly. When it comes to taste, opinions differ: personally, I find that both types of grills can produce delicious and aromatic dishes. Those new to grilling will benefit from the easily adjustable temperature control via separate burners on a gas grill. With a charcoal grill, the temperature is controlled by air supply at the bottom of the grill and by the lid, which can be a bit tricky at first. For those who want to combine the convenience of a gas grill with a smokier taste, there are also smoker accessories or wood planks for the food to increase smoke development. Campingaz: What should I consider when it comes to grilled food – can I grill everything on any grill? Eugen: A clear yes! In principle, you can prepare almost any grilled food on a charcoal or gas grill. Some dishes, like pancakes or fried eggs, require special grill plates or pans, which are available for both types of grills. Thanks to the easily adjustable temperature on a gas grill, handling here might be a bit simpler than on a charcoal grill. Campingaz: Speaking of accessories: What's your favorite grilling accessory and why? Eugen: My absolute favorite accessory is the pizza stone! I also love grilling with a wok and plancha plates. You can be very creative with them and conjure up a wide variety of dishes. I also use the Campingaz Culinary Modular System for this: the central unit can be easily removed, allowing me to install various accessories as needed. This prevents anything from slipping, and I can ideally play with the temperature using the high-performance burner and cook flexibly. Campingaz: Do you have a secret tip for us regarding gas grills? Eugen: Probably not a secret tip, but very practical [laughs]. I'm absolutely thrilled with the InstaClean Aqua System. I've never been able to clean a grill so quickly and easily: simply fill with water, drain the water after grilling, rinse thoroughly, and you're done. This saves time, effort, and the use of cleaning agents. This way, the grill station always stays well-maintained and ready for immediate use. Campingaz: What are your biggest dos and don'ts when grilling? Eugen: When it comes to cleaning, you should definitely avoid using aluminum foil as a liner. Although it's tempting to simply replace the aluminum foil, it can release harmful substances at high temperatures. In addition, dripping fat on the foil can easily ignite and lead to massive flames. Systems with a water-filled grease drip tray, as found in many gas grills, are much safer and still easy to clean. Wrapping grilled food in aluminum foil is also not an optimal choice for me – I prefer baking paper or special grill trays here. As for the dos: I always recommend having a spare gas bottle handy. With gas grills, a regular safety check is also important: I check the hose for leaks every time I change the bottle. This is quick, prevents hazards, and ensures relaxed grilling enjoyment. Campingaz: Grilling is a real national pastime, especially in Germany. What, in your opinion, has changed most significantly in grilling in recent years? Eugen: I think people have become more experimental and creative when grilling. Where in the past mainly sausages and neck steaks were put on the grill, today many new ingredients and a wide variety of grilled foods are being tried out. This creates a whole new variety on the grill, from vegetables to fish to vegetarian and vegan alternatives. Campingaz: What, in your opinion, are the grilling trends for the coming years? Eugen: Definitely vegetarian and vegan grilling. The awareness of the origin, quality, and husbandry of meat is growing enormously, even for me. Grilling today is more than just preparing food – it's an experience of enjoyment and a social occasion. Often, people prepare food together, chop ingredients together, and then enjoy the grilled food. And the grill is no longer just a male domain – more and more women are discovering a passion for grilling. Campingaz: Where and for whom do you prefer to grill? Eugen: I prefer to grill in my outdoor kitchen for and with family and friends. But as a camper, I'm also happy to always have the grill with me. Grilling simply goes everywhere, whether in the home garden, camping, or at a festival. Thank you very much, Eugen, for the exciting information and tips. If you're still looking for the right grill, be sure to check out our webshop. And don't forget: the trend is towards a second grill – for more convenience and variety when grilling. Click here for our grills!
Learn more
Eugen's grill tip: The right flame size
Eugen's grill tip: The right flame size for vegetables and meat on the gas grill Full throttle or rather on a low flame? Eugen can help you. For perfectly cooked vegetables, indirect grilling is best. This way, the outside doesn't get too brown too quickly while the inside is still raw. It's best to grill the vegetables on a griddle—this prevents food from falling through the grate into the flames. It's also a good idea to cut the vegetables into large slices or pieces rather than dicing them too finely. This works best at a temperature of 180 to 220 degrees Celsius (356 to 428 degrees Fahrenheit). You can easily set this directly on gas grills. With meat, you can grill indirectly or directly, depending on your taste. Pulled pork or spare ribs turn out best with indirect grilling – with the lid closed, over a low heat at 80 to 90 degrees Celsius. To sear steaks or hamburgers, turn the gas grill up to 250 to 300 degrees Celsius and place the meat on the grill, turning it frequently until browned. Then finish cooking at a lower temperature of around 180 to 220 degrees Celsius. Tip: On gas grills with two or more burners, one side can be used for direct grilling and the other for indirect grilling.
Learn more